

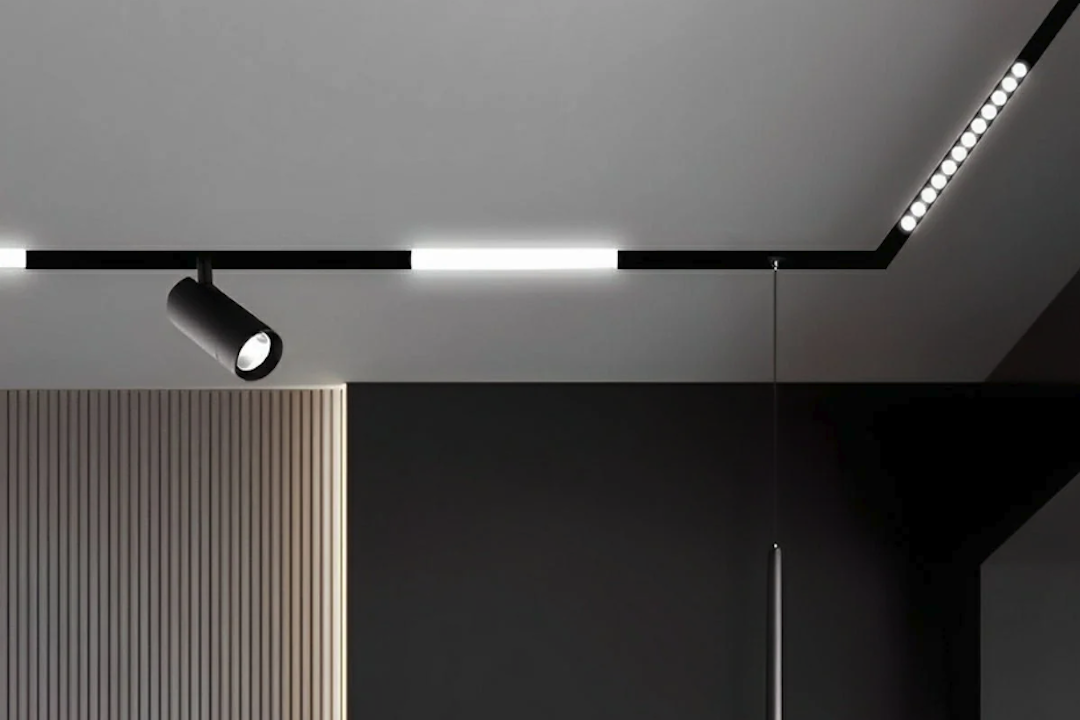
Mainless Lighting Size & Wattage Guide for Perfect Illumination
Mainless lighting, also known as decentralized or distributed lighting, offers a flexible and often more efficient way to illuminate spaces compared to traditional central fixtures. The key to perfect illumination with this approach lies in understanding the right size and wattage for each individual light source, rather than relying on a single overhead fixture to do all the work. It’s about creating layers of light that work together to achieve both functionality and ambiance, and getting it right can significantly enhance the comfort and utility of any room.
Understanding Mainless Lighting: A Paradigm Shift
Mainless lighting fundamentally changes how we think about illuminating a space. Instead of a large, dominant fixture in the center of a room, mainless lighting uses multiple, smaller light sources Hnccom strategically placed to achieve desired effects. Think of it as painting with light, where each individual light is a brushstroke contributing to the overall picture. This approach offers incredible versatility, allowing for dynamic lighting scenes, task-specific illumination, and enhanced visual comfort. It moves away from the “one-size-fits-all” ceiling fixture and towards a more tailored, human-centric lighting design.
What Defines Mainless Lighting?
The core characteristic of mainless lighting is the absence of a primary, central light source. This doesn’t mean no overhead lights at all, but rather that no single overhead light is expected to provide the sole or primary illumination for the entire room. Instead, a combination of recessed downlights, track lighting, wall sconces, floor lamps, table lamps, and even integrated cabinet lighting works in concert. This distributed approach provides greater control over brightness, direction, and color temperature, allowing you to create different moods and highlight specific areas or objects. It’s particularly effective in larger rooms, open-plan living spaces, and areas where traditional central fixtures create unwanted shadows or glare.
Benefits of a Distributed Approach
The advantages of mainless lighting are numerous and practical. Firstly, it offers superior flexibility. You can adjust the intensity and focus of individual lights, tailoring the illumination to specific activities like reading, cooking, or entertaining. Secondly, it often leads to better visual comfort by minimizing glare and harsh shadows, which are common issues with single, powerful overhead lights. By spreading out the light sources, you achieve a more even and diffused illumination. Thirdly, it enhances the aesthetic appeal of a space, allowing architectural features, artwork, or furniture to be highlighted. It can make a room feel larger, more inviting, and more sophisticated. Lastly, with the advent of LED technology, mainless lighting can be incredibly energy- efficient, as you only illuminate the areas that require it at any given time, potentially reducing overall energy consumption compared to constantly powering a large central fixture.
The Foundation: Light Layers and Lux Levels
To effectively implement mainless lighting, it’s crucial to understand the concept of light layers and how they contribute to overall illumination. Each layer serves a specific purpose, and by combining them thoughtfully, you can achieve a balanced and functional lighting scheme. Furthermore, understanding recommended lux levels (a measure of illuminance) for different tasks provides a practical benchmark for sizing and wattage decisions.
Defining Light Layers
Think of lighting a room like dressing in layers – each piece serves a purpose and contributes to the overall effect. In lighting design, we typically talk about three main layers:
Ambient Lighting
This is the general, foundational light that fills the entire space. It’s not meant to be bright enough for specific tasks, but rather to provide overall visibility and prevent a room from feeling cave-like. In a mainless setup, ambient lighting might come from a combination of recessed downlights on dimmers, indirect cove lighting, or even wall-washing sconces. Its purpose is to create a comfortable base level of illumination, ensuring safe passage and a general sense of brightness. The key is to distribute it evenly to avoid dark spots and harsh contrasts.
Task Lighting
As the name suggests, task lighting is specifically designed to illuminate areas where particular activities take place. This could be over a kitchen counter for food preparation, a desk for working, a reading nook, or a vanity mirror. Task lights are typically more focused and brighter than ambient lights, providing the necessary illumination without causing strain. Examples include under-cabinet lights, desk lamps, floor lamps with adjustable heads, or pendant lights hung directly over a workstation. The wattage and beam angle for task lighting will be determined by the specific activity and the proximity of the light source to the task area.
Accent Lighting
Accent lighting is all about highlighting specific features, objects, or architectural elements in a room. It adds drama, depth, and visual interest. This layer is often achieved with spotlights, track lights with adjustable heads, picture lights, or even integrated LED strips. The goal is to draw attention to something, whether it’s a piece of art, a collection on a shelf, or a textured wall. Accent lights are typically lower wattage and have a narrower beam angle than task or ambient lights, as their purpose is to create a focal point rather than widespread illumination.
Recommended Lux Levels for Different Spaces
While “perfect illumination” is subjective, industry standards and ergonomic guidelines provide useful benchmarks for lux levels (lumens per square meter or foot). These aren’t rigid rules but rather practical starting points to guide your decisions.
General Living Spaces
For living rooms, family rooms, and bedrooms, a comfortable ambient lux level typically ranges from 100 to 200 lux. This provides a relaxed atmosphere suitable for conversation, watching TV, or simply relaxing. When reading, however, the task area would need closer to 300-500 lux.
Kitchens and Dining Areas
Kitchens require higher lux levels for food preparation and safety. Countertops should ideally have 300 to 500 lux, while general ambient lighting can be around 200-300 lux. Dining tables often benefit from focused lighting around 200-300 lux, creating a pleasant atmosphere without being overly bright.
Home Offices and Study Areas
For focused work, home offices demand higher illumination to prevent eye strain. Desktops and work surfaces should aim for 300 to 500 lux. General ambient lighting in an office can be around 250-350 lux.
Bathrooms
Bathrooms need good general illumination, especially around the vanity mirror for grooming tasks. Vanity areas should target 300-500 lux, while the general ambient light in the bathroom can be 200-300 lux.
Sizing and Wattage Strategies for Mainless Systems
Once you understand the concept of light layers and target lux levels, you can start making practical decisions about the size and wattage of your individual light sources. This is where the mainless approach truly shines, as you tailor each component to its specific role. Remember, wattage now often refers to the equivalent incandescent wattage for LEDs, but it’s more accurate to focus on lumens (the actual light output) and beam angle.
Calculating Lumens Needed
The most effective way to determine the light output required is to calculate the total lumens needed for a room and then distribute those lumens among your mainless fixtures.
Room Size and Ceiling Height
Larger rooms and higher ceilings naturally require more lumens to achieve the same perceived brightness. As a very rough starting point, you might aim for 20-30 lumens per square foot for ambient lighting in a living space. For a kitchen, you might bump that up to 30-40 lumens per square foot.
- Example: A 10×12 foot living room (120 sq ft) at 20 lumens/sq ft needs approximately 2400 lumens for ambient lighting. If you plan to use six recessed lights, each would need to provide about 400 lumens.
Reflectivity of Surfaces
Lighter walls, ceilings, and floors will reflect more light, making a room feel brighter with fewer lumens. Conversely, darker colors will absorb more light, requiring higher lumen output to achieve the same effect. This is an important factor often overlooked. A room with dark wood paneling and deep-colored furniture will need significantly more light than a room with white walls and light-colored furnishings.
Selecting the Right Wattage (Lumens) and Beam Angle
For each type of light in your mainless system, you’ll select specific lumens and beam angles to fulfill its purpose.
For Ambient Lighting
- Recessed Downlights: These are common choices for ambient lighting. For an 8-foot ceiling, 4-inch or 6-inch fixtures are typical. For a 10×12 foot living room, you might use six 6-inch recessed lights, each providing 600-800 lumens, for a total of 3600-4800 lumens (factoring in some overlap and desiring a slightly brighter ambient). Use a wider beam angle (60-90 degrees) for general spread. Dimmers are crucial for adjusting the overall brightness.
- Cove Lighting/Linear LEDs: These provide soft, indirect light. Their lumen output can vary widely, but for ambient use, aim for 200-300 lumens per linear foot, often with a frosted diffuser for even light.
For Task Lighting
- Under-Cabinet Lighting: For kitchen countertops, aim for 200-400 lumens per linear foot, directly illuminating the work surface. Strip LEDs are very common here.
- Desk Lamps/Floor Lamps: These need to deliver focused light onto a specific area. A desk lamp might require a bulb producing 800-1000 lumens, often with a narrower beam or a shade to direct light. Floor lamps for reading might use a 1000-1500 lumen bulb, again with a directed or diffused shade.
- Pendant Lights: Over a kitchen island or dining table, pendants serve as task lighting. Depending on the size of the island/table and the desired brightness, individual pendants might range from 600-1000 lumens each, often with a downward-focused beam.
For Accent Lighting
- Spotlights/Track Lights: To highlight artwork or architectural features, aim for 300-600 lumens per fixture, but with a very narrow beam angle (15-30 degrees) to create a focused cone of light. Dimmers are essential here to fine-tune the intensity and dramatic effect.
- Picture Lights: These are designed to evenly illuminate a specific piece of art. The required lumens depend on the size of the artwork, typically ranging from 150-300 lumens for smaller pieces and up to 500 lumens for larger ones.
The Importance of Color Temperature (CCT)
Beyond brightness, the color temperature of your lights plays a significant role in setting the mood and visual comfort. Measured in Kelvins (K), CCT dictates whether the light appears warm (yellowish) or cool (bluish).
- Warm White (2700K-3000K): Ideal for ambient lighting in living rooms, bedrooms, and dining areas. It creates a cozy, inviting, and relaxing atmosphere.
- Neutral White (3500K-4000K): Good for kitchens, bathrooms, and home offices where a balance between warmth and alertness is desired. It’s often perceived as clean and crisp.
- Cool White (5000K-6500K): Best for task-intensive areas or utility spaces where maximum visibility and alertness are priorities, such as workshops or garages. Generally avoided for main living spaces as it can feel stark.
In a mainless system, you can even mix CCTs, using warmer ambient lights with slightly cooler task lights, for instance. However, try to maintain consistency within a single layer of lighting to avoid a jarring effect.
Practical Considerations for Installation and Control
Implementing a mainless lighting system goes beyond just choosing the right bulbs; it involves thoughtful planning for installation and, crucially, robust control mechanisms. This is where the system truly becomes flexible and functional.
Wiring and Electrical Planning
Because mainless lighting relies on multiple fixtures, the electrical planning becomes more complex than a single overhead fixture.
Dedicated Circuits and Zones
It’s highly advisable to run separate circuits for different lighting layers or zones. For example, ambient lighting might be on one circuit, task lighting (like under-cabinet lights) on another, and accent lighting on a third. This allows for individual control and prevents overloading a single circuit. Consulting with an electrician early in the design phase is crucial, especially for new construction or major renovations. They can advise on proper wiring gauges, breaker sizes, and code compliance.
Junction Boxes and Fixture Placement
Each individual fixture will require a power connection. For recessed lights, this means planning for their specific placement in the ceiling joists. For track lighting, you’ll need power at the start of the track. Wall sconces and integrated lighting elements will also require planned wiring routes. Think about how these wires will be concealed to maintain a clean aesthetic. This might involve running wires within walls, ceilings, or using conduit in exposed situations.
Advanced Control Systems
The true power of mainless lighting lies in its ability to be controlled dynamically. Simple on/off switches won’t unlock its full potential.
Dimmers for Every Layer
Every single light layer (ambient, task, accent) should ideally be on its own dimmer switch. This allows you to fine-tune the brightness of each layer independently, creating various moods and adapting to different activities. Modern LED dimmers are essential as they are designed to work efficiently with low-wattage LED bulbs and prevent flickering or buzzing. It’s often worth investing in high-quality dimmers.
Smart Home Integration
Integrating your mainless lighting with a smart home system (like Lutron Caséta, Philips Hue, or systems compatible with Alexa/Google Home) elevates control to a new level.
- Scene Creation: You can program specific “scenes” – for example, a “movie night” scene that dims ambient lights, turns off task lights, and highlights a piece of artwork. A “cooking” scene might turn on under-cabinet lights to full brightness while setting ambient lights to a neutral, medium level.
- Voice Control: The convenience of controlling your lights with voice commands is a significant advantage.
- Scheduling and Automation: Lights can be programmed to turn on/off at specific times, or even react to motion sensors or natural daylight levels.
- Remote Access: Control your lights from anywhere using a smartphone app, adding security and convenience.
While smart lighting can be an initial investment, the flexibility and convenience it offers for a mainless system are unparalleled.
Maintenance and Future-Proofing
Maintaining your mainless lighting system is generally straightforward, especially with modern LED technology. However, a few considerations can help ensure longevity and adaptability for the future.
LED Longevity and Replacement
One of the biggest advantages of LED lighting is its extended lifespan. Many LED bulbs are rated for 25,000 to 50,000 hours, meaning they can last for many years, significantly reducing the frequency of bulb changes.
Group Replacement Strategy
While individual LEDs last a long time, in a mainless system with many fixtures, you might find bulbs eventually start to fail at different times. For recessed lights or other difficult-to-reach fixtures, consider a “group replacement” strategy. When one or two bulbs in a group fail, it might be more efficient to replace all of them at once, especially if they are the same age and type, to maintain uniform brightness and color temperature.
Consistency in Replacements
When replacing individual bulbs, always try to match the lumens and, crucially, the color temperature (CCT) of the existing bulbs in that zone or layer. A mismatched CCT can be very noticeable and detract from the overall lighting design. Keep a few spare bulbs of each type on hand if possible.
Adaptability for Future Needs
A well-designed mainless lighting system should offer some degree of future-proofing, allowing you to adapt to changing tastes, technologies, or room functions.
Modular Fixtures
Track lighting is inherently modular, allowing you to add, remove, or reposition individual light heads as needed. Similarly, many recessed lighting systems allow for easy swapping of trim styles or even LED inserts (if they are integrated fixtures). Choosing systems that offer this flexibility can save you money and hassle down the line.
Smart Home System Upgrades
If you’ve invested in a smart home control system, ensure it’s built on an open standard or a widely supported platform. This makes it easier to integrate new devices or upgrade components as technology evolves without having to rip out your entire control infrastructure. Look for systems that are compatible with a broad range of smart lighting products.
Planning for Connectivity
When initially wiring, consider running extra low-voltage wiring to potential future locations for smart sensors, accent lighting strips, or even power for smart blinds. While you might not use it immediately, having the infrastructure in place makes future additions much simpler and less invasive. Thinking a step ahead during the planning phase can significantly ease future upgrades and expansions to your lighting system.